


Last updated: October 6, 2026
Introduction
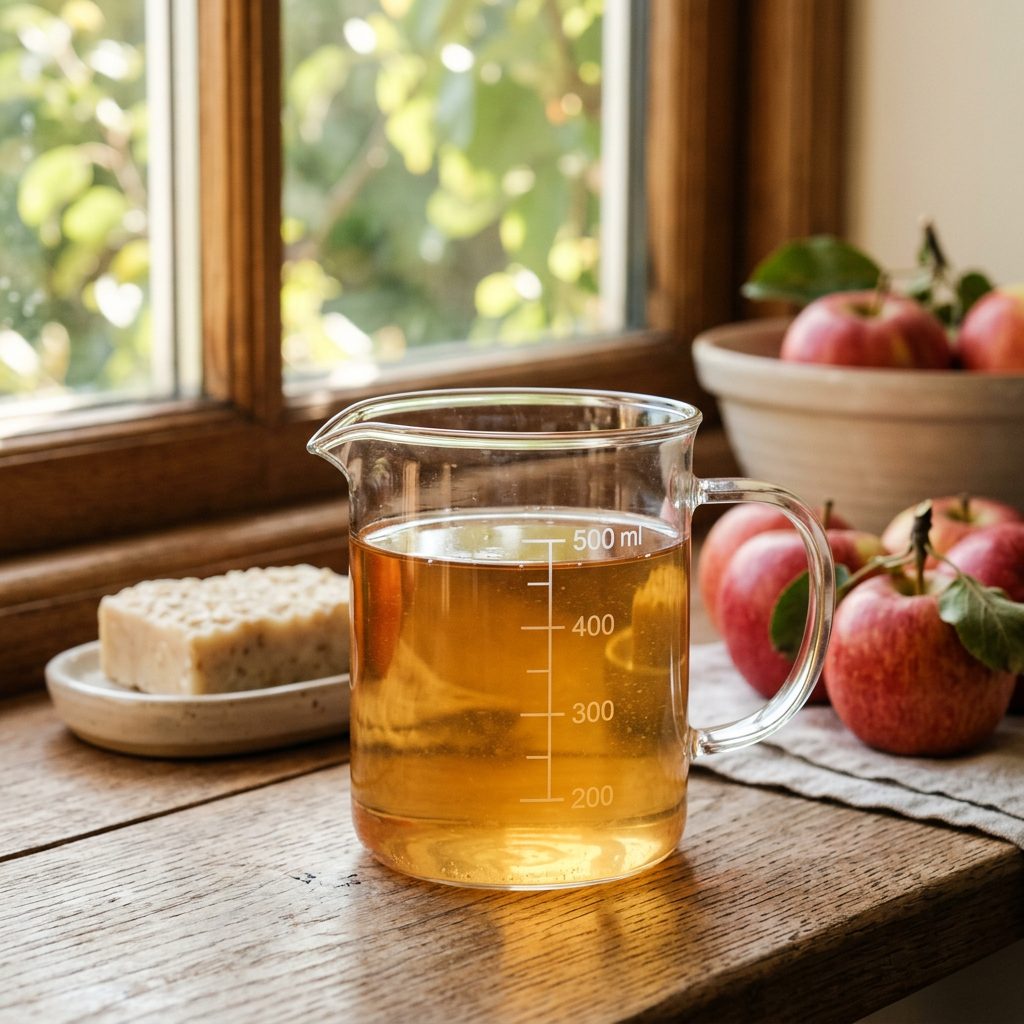
If you’ve made the switch to shampoo bars, you’ve likely heard about apple cider vinegar (ACV) rinses. This simple, natural treatment is one of the most powerful tools in your hair care arsenal—especially if you’re dealing with hard water, product buildup, or the dreaded “waxy transition period.”
But there’s a lot of conflicting information out there. Do you really need ACV rinses? How often should you use them? Can they damage your hair? And what’s the difference between an ACV rinse and a “clarifying treatment”?
This guide answers all of those questions with science-backed explanations and practical, step-by-step instructions.
What You’ll Learn: – What ACV rinses do (and don’t do) for your hair – The chemistry behind why ACV works with shampoo bars – How to make and use an ACV rinse properly – Frequency recommendations for different hair types and water hardness – Troubleshooting common ACV rinse problems – Alternatives if ACV doesn’t work for you
Whether you’re struggling with waxy buildup, dull hair, or hard water damage, ACV rinses can transform your shampoo bar experience.
What Exactly Is an Apple Cider Vinegar Rinse?
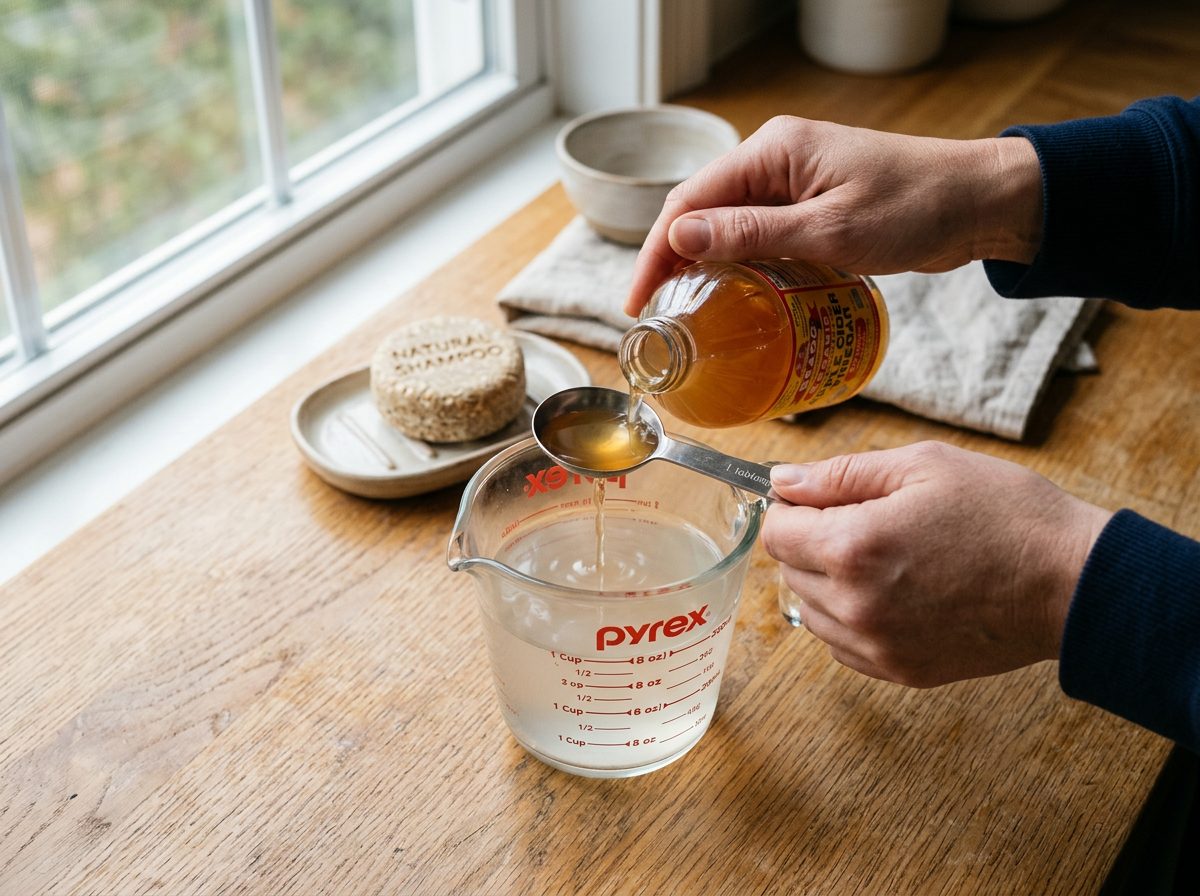
An apple cider vinegar rinse is a diluted acidic treatment applied to hair after shampooing. It typically consists of 1-2 tablespoons of raw, unfiltered apple cider vinegar mixed with 1 cup (250ml) of water.
The Basic Recipe: – 1-2 tablespoons raw apple cider vinegar (with “the mother”) – 1 cup (250ml) cool or lukewarm water – Optional: 2-3 drops essential oil (lavender, rosemary) to mask vinegar smell
That’s it. No complicated ingredients, no expensive products. Just vinegar and water.
Why Apple Cider Vinegar Specifically?

You might wonder: why not white vinegar, or lemon juice, or another acid?
Apple cider vinegar is ideal because: – pH 2.5-3.5: Perfectly acidic without being harsh (lemon juice is pH 2, white vinegar pH 2.4—both more acidic) – Nutrient content: Contains trace minerals, vitamins, and organic acids (acetic, malic, citric) – Gentle on scalp: Less irritating than stronger acids – Antimicrobial properties: The acetic acid helps control scalp bacteria and fungus – “The mother”: Raw, unfiltered ACV contains beneficial enzymes and probiotics
White vinegar works in a pinch, but it’s more acidic and offers no nutritional benefits. Lemon juice is too acidic for frequent use and can lighten hair color over time.
Best ACV brands: Bragg, Willy’s, Eden Organic (look for “raw,” “unfiltered,” “with the mother”)
The Science: Why an Apple Cider Vinegar Rinse Works with Shampoo Bars
To understand why ACV rinses are so effective with shampoo bars, you need to understand hair structure and pH.
Hair Cuticle Chemistry
Your hair shaft is covered in overlapping cuticle scales (like roof shingles). When cuticles lie flat, hair looks shiny, feels smooth, and tangles less. When cuticles lift and open, hair looks dull, feels rough, and tangles easily.
What controls cuticle position? pH.
- Acidic pH (4.5-5.5): Cuticles close and flatten
- Neutral pH (7): Cuticles relax
- Alkaline pH (8-11): Cuticles swell and lift open
Most tap water is pH 6.5-8.5 (neutral to slightly alkaline). Hard water can be even more alkaline (pH 8-9) due to dissolved minerals.
When you shampoo with a bar (especially detergent bars, which are pH 5-7), then rinse with tap water, your cuticles never fully close. They stay slightly lifted, making hair feel rough and look dull.
This is where ACV comes in.
An ACV rinse (pH 3-4 when diluted) rapidly closes the cuticles, sealing the hair shaft. The result: instant shine, smoothness, and detangling.
Hard Water + ACV: The Perfect Solution
If you live in a hard water area (calcium/magnesium >180 ppm), ACV rinses become even more critical.
Why hard water causes buildup: – Hard water minerals (calcium carbonate, magnesium carbonate) deposit on hair during washing – These minerals are alkaline (pH 8-9), forcing cuticles open – Open cuticles trap more minerals → layer builds up over weeks – Result: hair feels waxy, greasy, heavy, tangled, dull
How ACV dissolves hard water buildup:
Apple cider vinegar is acidic. When you apply it to mineral-coated hair, a chemical reaction occurs:
Acetic acid + calcium carbonate → calcium acetate (dissolves) + carbon dioxide + water
The acid breaks apart the mineral deposits, converting them into water-soluble compounds that rinse away easily.
This is chelation—the process of removing mineral buildup using acidic agents.
For hard water users, ACV rinses are not optional. They’re essential maintenance to prevent long-term damage.
ACV vs. Clarifying Shampoos
You might think: “Can’t I just use a clarifying shampoo?”
Clarifying shampoos use stronger surfactants (sulfates) to strip away buildup. They work, but: – Harsh on color-treated hair (strip dyes) – Can over-dry hair and scalp – Don’t close cuticles (may leave hair rough) – More expensive than ACV
ACV rinses: – Gentle chelation (acid dissolves minerals) – Close cuticles (improve shine and smoothness) – Balance scalp pH (reduce oiliness, dandruff) – Cost pennies per rinse
Both have their place, but for regular maintenance with shampoo bars, ACV is gentler and more effective.
How to Make an Apple Cider Vinegar Rinse Step by Step
Here’s the complete process, from mixing to application.
What You’ll Need
- Raw, unfiltered apple cider vinegar (with “the mother”)
- Measuring spoons (tablespoon)
- Measuring cup (250ml / 1 cup)
- Mixing container (small bowl, plastic bottle, or spray bottle)
- Cool or lukewarm water (NOT hot—hot water opens cuticles)
Optional: – Essential oils (lavender, rosemary, peppermint—2-3 drops) – Strainer (if using herbs like rosemary or chamomile)
The Basic ACV Rinse Recipe
For most hair types: – 1 tablespoon ACV – 1 cup (250ml) water
For very hard water (>300 ppm): – 2 tablespoons ACV – 1 cup (250ml) water
For dry or damaged hair: – 1 tablespoon ACV – 1.5 cups (375ml) water (more diluted)
For oily scalp: – 1.5 tablespoons ACV – 1 cup (250ml) water (stronger concentration)
Step-by-Step Application
1. Shampoo as normal – Wet hair thoroughly (2-3 minutes) – Apply shampoo bar (lather in hands, apply to scalp) – Massage 1-2 minutes – Rinse completely (until water runs clear)
2. Mix your ACV rinse – In a small bowl or bottle, combine ACV and water – Stir or shake to mix – Optional: Add 2-3 drops essential oil
3. Apply the rinse – Method A (pour-over): Lean head back over sink or in shower, pour rinse slowly over hair from roots to ends – Method B (spray bottle): Spray rinse onto hair, section by section, focusing on scalp and mid-lengths – Method C (dunk method): For long hair, dunk ends into bowl of ACV rinse
Make sure the rinse contacts your scalp and all of your hair (not just ends).
4. Let it sit (optional) – For light maintenance: rinse out immediately – For hard water buildup: let sit 1-2 minutes before rinsing – For dandruff/scalp issues: let sit 2-3 minutes before rinsing
5. Rinse with cool water – Rinse thoroughly with cool or lukewarm water (NOT hot) – You can rinse until the vinegar smell is gone, or leave a light scent (it fades as hair dries) – Cool water final rinse = extra cuticle closing (even shinier hair)
6. Condition (optional) – If your hair is dry or damaged, apply conditioner to ends only (avoid roots) – If your hair is oily or fine, skip conditioner (ACV provides enough smoothness)
7. Dry and style as normal
The vinegar smell will dissipate as your hair dries. If it bothers you, add a few drops of essential oil to the rinse, or rinse more thoroughly.
How Often Should You Use an Apple Cider Vinegar Rinse?
Frequency depends on your water hardness, hair type, and whether you’re dealing with buildup.
General Guidelines
| Water Type | Recommended Frequency |
|---|---|
| Soft water (<60 ppm) | 1-2x per month (optional) |
| Moderately hard (60-180 ppm) | 1x per week |
| Hard water (180-300 ppm) | 2x per week |
| Very hard water (>300 ppm) | Every wash (or every other wash) |
If you’re in the shampoo bar transition period (first 2-4 weeks): – Use ACV rinse every wash until waxy buildup resolves – After transition, reduce to maintenance frequency based on water hardness
Hair Type Adjustments
Oily hair: – Can tolerate more frequent ACV rinses (every wash if needed) – ACV helps balance scalp pH → reduces excess oil production
Dry or damaged hair: – Use more diluted rinses (1 tbsp ACV to 1.5-2 cups water) – Limit to 1x per week unless dealing with hard water buildup
Color-treated hair: – ACV can slightly fade color (especially reds and purples) if used too frequently – Stick to 1x per week maintenance unless hard water buildup requires more
Curly or coily hair: – ACV rinses are excellent for defining curls (closed cuticles = less frizz) – 1x per week or after every wash if hard water is severe
Signs You Need ACV Rinses More Often
- Hair feels waxy, greasy, or heavy after washing
- Hair tangles easily despite using conditioner
- Hair looks dull, lacks shine
- Scalp feels itchy or flaky
- Hair takes longer to dry than usual
- Styling products don’t work as well
These are all symptoms of mineral buildup or open cuticles—ACV rinses will help.
Signs You’re Using ACV Rinses Too Often
- Hair feels dry, straw-like, or brittle
- Scalp feels tight or irritated
- Color fading faster than expected
- Hair breaks easily when brushing
If you experience these symptoms, reduce frequency or dilute your rinse more.
Troubleshooting Common ACV Rinse Problems
Problem 1: “My Hair Smells Like Vinegar”
Solution: – Dilute more (1 tbsp ACV to 2 cups water) – Add essential oils to the rinse (lavender, rosemary, peppermint) – Rinse more thoroughly after applying – Use less ACV (0.5-1 tbsp instead of 2)
The smell should dissipate completely as hair dries. If it doesn’t, you’re using too much ACV or not rinsing enough.
Problem 2: “ACV Rinse Made My Hair Feel Dry”
Causes: – Too strong concentration (too much ACV, not enough water) – Using ACV too frequently for your hair type – Leaving it on too long – Not conditioning afterward (if you have dry hair)
Solutions: – Dilute more: 1 tbsp ACV to 2 cups water – Reduce frequency to 1x per week – Rinse out immediately instead of letting it sit – Apply conditioner to ends after ACV rinse
Problem 3: “ACV Rinse Didn’t Help My Waxy Buildup”
Possible causes: – Hard water minerals are severe (need stronger treatment) – Not using enough ACV – Not letting it sit long enough – Rinsing with hot water (re-opens cuticles)
Solutions: – Increase concentration: 2-3 tbsp ACV to 1 cup water – Let it sit 3-5 minutes before rinsing – Rinse with cool water – Try a chelating shampoo bar (citric acid or EDTA) in addition to ACV rinses – Consider a one-time clarifying treatment with baking soda + ACV (see below)
Problem 4: “My Scalp Feels Irritated After ACV Rinse”
Causes: – Rinse is too strong (too acidic) – You have sensitive skin or broken skin on scalp – ACV is getting in your eyes
Solutions: – Dilute more: 0.5 tbsp ACV to 1 cup water – Avoid applying directly to scalp (focus on mid-lengths and ends) – Patch test first if you have sensitive skin – Keep head tilted back to prevent ACV from running into eyes
Problem 5: “I Don’t See Any Difference”
If you have soft water and healthy hair, you might not notice dramatic results from ACV rinses. That’s okay—you don’t need them.
ACV rinses make the biggest difference for: – Hard water areas (mineral buildup removal) – Shampoo bar transition period (waxy buildup removal) – Dull, tangled, or frizzy hair (cuticle smoothing) – Oily scalp (pH balancing)
If your hair already looks shiny and feels smooth, ACV rinses are optional maintenance, not a necessity.
Advanced ACV Rinse Techniques
Once you’ve mastered the basic ACV rinse, you can experiment with enhanced versions.
ACV + Herbs Rinse (for extra benefits)
Rosemary ACV Rinse (for dark hair, scalp health, hair growth) – Steep 2 tbsp dried rosemary in 1 cup boiling water for 20 minutes – Strain out herbs, let liquid cool – Add 1 tbsp ACV – Use as normal rinse
Chamomile ACV Rinse (for blonde hair, soothing scalp) – Steep 2 chamomile tea bags in 1 cup boiling water for 15 minutes – Remove bags, let liquid cool – Add 1 tbsp ACV – Use as normal rinse (can slightly lighten blonde hair over time)
Lavender ACV Rinse (for calming scalp, pleasant scent) – Add 5-10 drops lavender essential oil to basic ACV rinse – Shake well before applying
Clarifying Treatment: Baking Soda + ACV (for severe buildup)
If you have severe hard water buildup or product residue (from silicones, heavy oils), you can do a one-time clarifying treatment:
Step 1: Baking Soda Wash – Mix 1 tbsp baking soda with 1 cup water – Apply to wet hair, focusing on areas with buildup – Massage gently for 1-2 minutes – Rinse thoroughly
Step 2: ACV Neutralizing Rinse – Mix 2 tbsp ACV with 1 cup water – Pour over hair immediately after baking soda rinse – Let sit 2-3 minutes – Rinse thoroughly
Warning: Baking soda is highly alkaline (pH 9) and opens cuticles aggressively. It’s effective for removing buildup, but it’s harsh. Use this method once per month maximum, and only if ACV rinses alone aren’t working.
Always follow baking soda with ACV to re-close cuticles.
ACV Pre-Poo Treatment (for extremely dry hair)
If your hair is very dry or damaged, you can use ACV before shampooing instead of after:
Step 1: Apply diluted ACV to dry hair – Mix 1 tbsp ACV with 1 cup water – Apply to dry hair, focusing on ends – Let sit 5-10 minutes
Step 2: Shampoo as normal – Wet hair, apply shampoo bar – The ACV pre-treatment “primes” the cuticle to accept moisture
Step 3: Condition – Apply conditioner to ends – Rinse
This method is less common but works well for extremely dry or high-porosity hair.
ACV Rinses for Hard Water: Special Considerations
If you live in a hard water area, ACV rinses are your best defense against mineral buildup. But there are a few extra tips to maximize effectiveness.
Know Your Water Hardness
- Soft (<60 ppm): ACV rinses optional
- Moderate (60-180 ppm): 1x per week
- Hard (180-300 ppm): 2x per week
- Very hard (>300 ppm): Every wash or every other wash
How to test your water: Buy a water hardness test strip (available on Amazon for €5-10), or check your city’s water report online.
Adjust ACV Concentration for Hard Water
Standard recipe: – 1 tbsp ACV + 1 cup water
Very hard water recipe: – 2 tbsp ACV + 1 cup water (or 1.5 tbsp ACV + 1 cup water)
The extra acidity helps dissolve stubborn mineral deposits.
Combine ACV Rinses with Chelating Shampoo Bars
For best results in hard water, use a chelating shampoo bar (with citric acid, EDTA, or sodium citrate) AND do ACV rinses.
Why? – Chelating bars prevent new mineral buildup during washing – ACV rinses remove any remaining minerals and close cuticles – Together, they provide complete hard water protection
Recommended chelating ingredients in shampoo bars: – Citric acid (gentle, natural) – Sodium citrate (effective, natural) – EDTA (disodium EDTA, tetrasodium EDTA—synthetic but very effective)
Natural Answer Products bars are cold-process soap with no added chelators, so an ACV rinse after washing is what clears mineral film in hard water.
Hard Water ACV Rinse Routine
Frequency: Every wash or every other wash
Recipe: 2 tbsp ACV + 1 cup cool water
Method: 1. Wash with chelating shampoo bar 2. Rinse thoroughly with lukewarm water 3. Apply ACV rinse, let sit 2-3 minutes 4. Rinse with cool water 5. Condition ends if needed
This routine should keep your hair free of buildup, shiny, and manageable—even in very hard water.
ACV Rinses During the Shampoo Bar Transition Period
If you’ve just switched from liquid shampoo to shampoo bars, you might be experiencing the dreaded “transition period”—2-4 weeks of waxy, greasy, or heavy-feeling hair.
Why this happens: – Silicones and synthetic polymers from old shampoos are still coating your hair – Your scalp is adjusting oil production (was overproducing to compensate for harsh sulfates) – If you’re using a soap bar (not detergent-based), soap scum is forming in hard water
ACV rinses are your best tool for getting through transition faster.
Transition Period ACV Rinse Protocol
Frequency: Every wash (daily or every other day)
Recipe: 2 tbsp ACV + 1 cup water
Method: 1. Wash hair with shampoo bar as normal 2. Rinse thoroughly 3. Apply ACV rinse 4. Let sit 3-5 minutes (longer than usual) 5. Rinse with cool water 6. Optional: apply lightweight conditioner to ends
What to expect: – Week 1: Immediate improvement in smoothness, but buildup may persist – Week 2: Noticeable reduction in waxy feeling – Week 3-4: Hair starts feeling “normal” again—soft, shiny, manageable
By week 4-6, you can reduce ACV rinse frequency to your maintenance schedule (based on water hardness).
If ACV Rinses Aren’t Enough During Transition
Sometimes, especially in very hard water, you need extra help:
One-time clarifying treatment: – Use a sulfate-based clarifying shampoo (e.g., Suave Daily Clarifying) once to strip all buildup – Follow immediately with ACV rinse to close cuticles – Then resume shampoo bar + regular ACV rinses
This “reset” can shorten transition from 4 weeks to 1-2 weeks.
ACV Rinse Benefits Beyond Shine
Most people use ACV rinses for shine and smoothness. But there are several other science-backed benefits:
1. Scalp pH Balancing
Your scalp’s natural pH is 4.5-5.5 (slightly acidic). Alkaline shampoos, hard water, and sweat can raise scalp pH to 6-7, creating an environment where: – Bad bacteria thrive (causing odor, irritation) – Fungus grows (causing dandruff, seborrheic dermatitis) – Oil glands overproduce (causing greasy hair)
ACV rinses restore acidic pH, which: – Suppresses bacterial and fungal growth – Normalizes sebum production (less oily hair over time) – Reduces scalp irritation and itching
2. Dandruff Reduction
If you have dandruff (white flakes, itchy scalp), ACV rinses can help in two ways:
Antifungal action: Acetic acid kills Malassezia yeast (the fungus responsible for most dandruff)
Exfoliation: Mild acidity loosens dead skin cells, preventing flake buildup
How to use ACV for dandruff: – 2 tbsp ACV + 1 cup water – Apply to scalp, massage gently – Let sit 5 minutes before rinsing – Use 2-3x per week until dandruff improves, then reduce to 1x per week maintenance
3. Frizz Control
Frizz happens when the hair cuticle lifts and individual strands separate. ACV rinses close cuticles tightly, locking in moisture and preventing frizz.
This is especially effective for: – Curly and wavy hair (where frizz is a constant battle) – Humid climates (where moisture in the air opens cuticles) – Damaged or porous hair (where cuticles are already lifted)
4. Color Longevity (Semi-Permanent Dyes)
For semi-permanent or deposit-only dyes (Manic Panic, Arctic Fox, henna), ACV rinses help seal color into the hair shaft.
How it works: Closed cuticles trap color molecules inside the cortex, preventing them from washing out as quickly.
Important: ACV can fade permanent oxidative dyes (salon color) if used too frequently. For permanent color, limit ACV rinses to 1x per week.
5. Detangling
If your hair tangles easily (especially after washing), ACV rinses provide instant slip. Smooth, closed cuticles glide past each other instead of catching and knotting.
This is especially helpful for: – Long hair – Fine or thin hair – Kids’ hair (easier brushing = less tears!)
Alternatives to ACV Rinses
If you can’t use apple cider vinegar (allergy, smell sensitivity, not available), here are alternatives:
1. White Vinegar
- More acidic than ACV (pH 2.4 vs. 3)
- No nutritional benefits (distilled, filtered)
- Cheaper and easier to find
When to use: If you can’t find ACV, white vinegar works for cuticle closing and buildup removal. Dilute more (1 tbsp to 2 cups water).
2. Lemon Juice
- Very acidic (pH 2)
- Can lighten hair color over time (not ideal for dark hair)
- Pleasant scent
When to use: Occasional clarifying treatment (1x per month). Not recommended for frequent use (too acidic).
3. Citric Acid Rinse
- Pure citric acid powder (available online or in canning sections)
- pH 2-3 when diluted
- Odorless
Recipe: 1/4 tsp citric acid powder + 1 cup water
When to use: If vinegar smell bothers you. Citric acid provides the same cuticle-closing and chelating benefits without the odor.
4. Acidic Leave-In Sprays
Some commercial leave-in conditioners are pH 4-5 and provide similar cuticle-closing benefits: – Kinky-Curly Knot Today (pH 4.5) – Shea Moisture leave-ins (pH 4-5) – DIY: Mix 1 tsp ACV + 1 cup water in spray bottle, use as leave-in detangler
5. Chelating Shampoo Bars Alone
If you use a chelating shampoo bar (with citric acid or EDTA) and your water is only moderately hard, you might not need ACV rinses at all. The bar provides enough mineral protection.
Conclusion: Should You Use an Apple Cider Vinegar Rinse?
Use ACV rinses regularly if: – You live in a hard water area (>180 ppm) – You’re in the shampoo bar transition period – Your hair looks dull or tangles easily – You have oily scalp or dandruff – You have curly or frizzy hair – You swim in chlorinated pools (chlorine + minerals = double buildup)
You probably don’t need ACV rinses if: – You have soft water (<60 ppm) – Your hair already looks shiny and feels smooth – You have very dry or damaged hair (use sparingly—1x per month) – You use a chelating shampoo bar that already prevents buildup
Start here: – 1 tbsp ACV + 1 cup water – Use once per week – Adjust frequency and concentration based on results
ACV rinses are one of the simplest, cheapest, and most effective treatments you can add to your shampoo bar routine. Give them a try—your hair will thank you.
Frequently Asked Questions
Can I use ACV rinses every day? Yes, if you have very hard water or oily hair. But most people only need 1-3x per week.
Do I need to rinse out the ACV rinse, or can I leave it in? You can do either. Rinsing out removes the smell but keeps the cuticle-closing benefits. Leaving a small amount in (very diluted) can provide extra detangling and frizz control.
Will ACV rinses lighten my hair color? Not significantly. ACV is much less acidic than lemon juice. However, frequent use (daily) can slightly fade permanent dyes. Stick to 1x per week for color-treated hair.
Can I make a big batch of ACV rinse and store it? It’s best to mix fresh each time. But you can pre-mix a larger batch and store it in the fridge for up to 1 week. Shake before using.
Is ACV safe for kids’ hair? Yes! ACV rinses are safe for children. They help with tangles and make brushing easier. Use a more diluted rinse (1 tbsp ACV to 2 cups water) and avoid getting it in their eyes.
Can I use ACV rinses with conditioner? Yes. Apply ACV rinse first, rinse it out, then apply conditioner to ends. Or skip conditioner if your hair doesn’t need it—ACV rinses provide enough smoothness for many hair types.
I have a sensitive scalp. Is ACV safe? ACV is generally safe for sensitive scalps. Dilute more (0.5-1 tbsp to 1 cup water) and avoid applying directly to irritated skin. Patch test first if you’re concerned.
Author’s Note: I’ve been using ACV rinses with shampoo bars for 3+ years in a very hard water area (300+ ppm). They’re the single most effective treatment I’ve found for preventing buildup and maintaining shine. If you’re struggling with your shampoo bar, try an ACV rinse before giving up—it makes all the difference.
Try Natural Answer shampoo bars: Our bars are cold-process soap with no added chelators, so the ACV rinse is what clears hard-water film and keeps your hair healthy and beautiful—even in the hardest water.